Hi everyone, Bobbi here! Today, I am sharing a spooky Halloween tag that I made for Inspiration Emporium. It's still not too late to get in on their fun "Fall is in the Air" challenge!
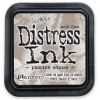
I started with a #8 Manila tag. I painted a layer of seedless preserves distress paint onto the surface of the tag and dried with a heat tool. It's important to use the distress paint because after it's dry it will be permanent and it's much better for layering with this technique (yes I put the wrong item in my picture for my seedless preserves, it really was the distress paint...oops :) Then I took my Tim Holtz Shattered stencil and placed over my tag and applied the black soot distress paint on over the stencil with a blending tool so that the paint wasn't too wet to seep under the stencil. I used my heat tool to dry.
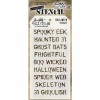
I used brushed pewter distress paint (watered down) and dripped a few drops from the top of the tag so it would create a couple of streaks. I dried thoroughly with a heat tool after I was happy with the streaks. Now I had some fun with the new Ranger texture paste. I took the Tim Holtz Halloween stencil and applied the Ranger texture paste, choosing only a few of the words from the stencil. I set it aside to air dry, choosing not to use my heat gun to speed the process up.
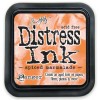
To add the color to the texture paste, I laid the stencil back over the dried wording and applied distress paint using a fairly dry paint brush. If your paintbrush is too wet, the paint will seep in under the stencil. I did have just a couple of spots that I had to go back and clean up with some Black Soot paint but it wasn't too bad. The colors that I ended up using were Mustard seed, mowed lawn and spiced marmalade distress paint. To make sure everything was good and dry, I used my heat tool. For an extra touch I added a little bit of black soot distress paint just with my finger skimming very lightly over the top of the raised wording.
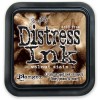
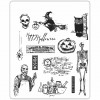
I stamped, colored and cut the jack-o'-lantern, spider and skull using Tim Holtz distress watercolor paper and distress inks. I diecut the bats out of grungeboard then painted with the Pumice stone distress paint. I used a Tim Holtz Sanding grip to scratch off some of the painted surface to expose the grungeboard and inked with walnut stain distress ink. I stamped Happy Halloween on the tattered banner and folded to shorten so it would fit on my tag. after I had glued everything in place I attached some Apothecary Remnant Rubs, wishbone and linen ribbon.
Now remember to enter your fall themed projects over at Inspiration Journal and one lucky winner will be given a very generous $50 gift credit, to spend at Inspiration Emporium. You can find all the supplies I used at Inspiration Emporium via the links below. Remember to use my coupon code - vintagemuse - to save 10% on your order. I hope you enjoyed my spooky Halloween tag! If you have any questions or if there's anything I missed please let me know I love your comments! Thanks for stopping by and I'll see you next time!











This is stunning Bobbi!!! Love everything about it....you've inspired me to go play!!
ReplyDeleteThank you Laura, have fun!
DeleteVery fun project Bobbi!
ReplyDeleteI just had to stop by to see how you created this beautiful tag. LOVE all the techniques you used and love your spooky tag!
ReplyDeleteThank you so much Shelly, I always have a lot of fun experimenting with different techniques!
DeleteWhat a beautiful tag! I love the seedless preserves background against the black soot to make your spider web. Thank you for sharing your techniques!
ReplyDeleteThank you Sara, it was definitely one of those "hmmm, I think I like that" moments! :)
Delete