Hi everyone! Today I'm here sharing a fall decor idea with you. I thought my fall decorations could use a little addition, so I made a banner out of Tim Holtz goodness of course. I believe I already have just the right spot in mind to add a little extra fall flair!
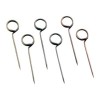
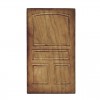
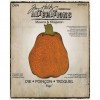
I cut banners out of burlap for my base and attached ex-large eyelets at the top left and right corner of each panel. I colored, cut and embossed around 11 of those large layered leaves from manila card stock. The large and small pumpkins were cut from Tim Holtz dies and grungeboard. I cut the Tim Holtz Passage Door from Manila card stock, shaded with walnut stain ink and added a ring fastener in the center as a door knocker. The tiny leaves were cut from the Tim Holtz autumn gathering die and Kraft Core card stock, then shaded with walnut stain ink.
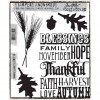
For the second panel I added some color to a piece of Manila card stock then I stamped the "thankful" saying with black archival ink. Distress the edges of the card stock with a bone folder or distressing tool.
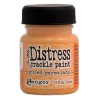
The third panel I cut a Tim Holtz window die out of Manila card stock, then shaded with walnut stain and gathered twig inks. I rummaged through my Tim Holtz Found Relative cards and found one that would fit nicely with the window panel, I trimmed it down so it would fit properly. The small pumpkins were colored with spiced marmalade distress crackle paint and gathered twig distress paint.
I took a small piece of Manila card stock layered some color on it then stamped "remember the now" with black archival ink. The large pumpkin was colored with spiced marmalade, rusty hinge, gathered twig and frayed burlap distress paint. After completely dried, I added a layer of clear rock candy distress crackle paint over the top and let it dry. To accent the cracks go over surface with a darker color of distress stain, soak up excess and dry with heat tool.
For the final panel I stamped the pumpkin on Tim Holtz watercolor paper and colored with distress ink. I stamped the wheat on kraft core card stock and shaded with walnut stain ink and layered on a manila tag. I tied the panels to each other using twine and finished with hand dyed crinkle ribbon bows. If you are wondering about the glue, I used Helmar 450 Quick Dry Adhesive. Burlap might be a little harder to get regular adhesives to stick to :)
Now remember to enter your fall themed projects over at Inspiration Journal and one lucky winner will be given a very generous $50 gift credit, to spend at Inspiration Emporium. You can find all the supplies I used at Inspiration Emporium via the links below. Remember to use my coupon code - vintagemuse - to save 10% on your order. I hope you enjoyed my fall decor banner! If you have any questions or if there's anything I missed please let me know I love your comments! Thanks for stopping by and I'll see you next time!








No comments:
Post a Comment