
Hello friends! Compendium of Curiosities III Challenge #27 is here, I got a jump on this one {wink}! Linda Ledbetter is hosting this CC3 Challenge over on her blog Studio L3. All the tips and techniques for this challenge is found on page 61 of Tim Holtz's Compendium of Curiosities Volume Three book. If you don't have this great book you can find it here and Tim Holtz will even sign it for you! This challenge is sponsored by Inspiration Emporium who have a wonderful $50 gift voucher to give away to one lucky winner. Also, the Curiosity Crew Pick wins a fabulous pack of goodies from Tim and Mario! Now, here is my take on this fun Embossing Diffuser Challenge!

I've listed all the products I have used to create this card in the links below.

First I cut a Tim Holtz mask using the inside of my embossing diffuser and cut out. I placed sticky side down, in the center of my distress watercolor cardstock.


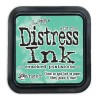
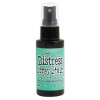
I sprayed Mermaid Lagoon, Peacock Feathers and Cracked Pistachio Distress Spray Stain over the entire surface of the watercolor cardstock spraying water as needed to move color around. Then very very carefully, use a heat tool to dry the surface of the cardstock. Remember that the mask is not heat safe, it will buckle and warp if it gets too hot. At the end my mask started to warp just a little, but I wasn't too concerned with it.

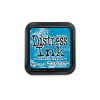
I also made a mask out of the outer portion of the embossing diffuser. I placed the mask over the outer portion that was just colored. Using Walnut Stain Distress Ink and a blending tool, I added color to the inner portion of the triptych. Also adding a few water splotches and dried with the heat tool carefully.

Then I stamped my images while the outer mask is still in place.

The colors that I stamped with were Mermaid Lagoon, Peacock Feathers, Walnut Stain and Black Soot Distress Ink.

Here's where the Embossing Diffuser magic happens!

Here is the backside after it's done.

and the front closeup :)

I shaded the raised portions and outer edges with Walnut Stain Distress Ink and a blending tool.

I also distressed my edges with a bone folder. The base of the card is Tim Holtz Kraft Core cardstock #21 sanded with sanding grip.

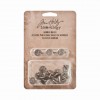
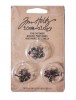
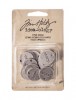
I had to add some hardware.

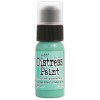
I distressed my idea-ology with Mermaid Lagoon and Cracked Pistachio Distress Paint and a little Mushroom Alcohol Ink.

I layered and adhered my metal idea-ology with glossy accents to my card.


Remember to enter your "Anything Goes" themed projects over at Inspiration Journal and one lucky winner will be given a very generous $50 gift credit, to spend at Inspiration Emporium. You can find most of the supplies I used at Inspiration Emporium via the links below. Remember to use my coupon code - vintagemuse - to save 10% on your order. I hope you enjoyed my Embossing Diffuser Card, there's plenty of time for you to join in on the fun over at CC3C #27! If you have any questions or if there's anything I missed please let me know I love your comments, I appreciate each and everyone of them! As always thanks for stopping by and I'll see you next time!


Bobbi, I am amazed !! This is gorgeous project. Love how you have created background with masking and embossing. layered stamping is beautiful!! And lovely effects with keys and gears. TFS detail process.
ReplyDeleteI pinned it on my Pinterest board
Bobbi that is so cool... love the colors ... who would have thought ?? Your choice of embossing folder and those stamps; with that amazing arch ... just fabulous !!
ReplyDeleteBobbi...your diffused embossed piece is way cool! LOVE the way you antiqued the metal pieces and WOW do they really finish off your piece beautifully! Your arched center looks amazing! Love your sprayed background colors. Love the embossed letters! Great project. Thanks for joining us at CC3C. <3 Candy
ReplyDeleteBobbi, that is fabulous! I'd not heard of the embossing diffuser technique until I started to see all of these amazing CC3C projects popping up around blogland and now it is most definitely on my wish list (along with Tim's Compendium of Curiosities series of books!). Love your project, aged to perfection with lots of vintage goodness. Thanks so much for sharing.
ReplyDeleteBrilliance! Fantastic tutorial and I absolutely LOVE love love how you used the Embossing Diffuser. The arch shape is such a great choice for this piece. Your art is always such a joy to view, but this is super special. Thanks for sharing it on CC3C!
ReplyDeleteFantastic! LOVE the color, the gent, the embossing...perfect! Thanks so much for joining in on the diffuser fun at CC3Challenge!!!
ReplyDeleteReally great card. The colors, technique and embellishments are all fabulous!
ReplyDeleteLove it - the grungy metal works as awesome accents. Thanks for sharing with us at CC3C!
ReplyDeleteWhoda thought to ink first diffuse later???? Love every square inch of this! The colors, the diffusing, the man, the drops!!! Pure vintage goodness!
ReplyDeleteWhoda thought to ink first diffuse later???? Love every square inch of this! The colors, the diffusing, the man, the drops!!! Pure vintage goodness!
ReplyDelete