
Hello friends! I'm happy you've stopped by today, I'm sharing a card I made for the Tim Holtz Sizzix Halloween release. If you missed Tim's Facebook Live Event, you can watch it here, or here. I've said it before and I'll say it again…Tim has the most incredible creative team! Every single one of them are so very talented and always leave me in awe. You will definitely want to check out their projects! I made this card using the Sizzix Tim Holtz Village Graveyard Thinlits die set. I'll walk you through how I put it together.

To start, I took a half sheet of printer paper and traced a circle in the center using the lid of my Distress Collage Medium. I thought it was just the right size for a spooky moon, in my graveyard.

I cut out the circle and saved both pieces, they will be used as masks.

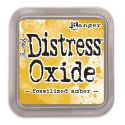
I tacked down a sheet of Distress Watercolor Cardstock to my nonstick craft sheet with painters tape. You can also use washi tape or a low tack adhesive tape, that's not going to tear paper when removed. Then I placed the outer portion of the circle over the upper right side of my cardstock and tacked it down with some painters tape. Using Fossilized Amber Distress Oxide and an ink blending tool with foam, I started building the color for my moon. Applying the color in a swirling motion, leaving a little white space in the center for depth.

I continued saturating the color till I was happy with hue.

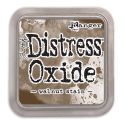
I added to the depth, with the smallest amount of Walnut Stain Distress Oxide to lower right and upper left portions of my moon.

I removed the mask and dried moon with heat tool. Then placed the inner portion of the circle to moon with more painters tape. For my graveyard, I applied Peeled Paint Distress Oxide to lower portion of cardstock. Drying with a heat tool between each new color applied. Remember to start swirling ink on edge of non stick craft sheet in a swirling motion and continuing onto cardstock. That way you don't get that round halo of color, that doesn't blend very well.

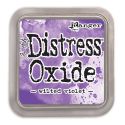
You guessed it, the spooky night sky received a fair amount of Wilted Violet Distress Oxide.

I applied some Walnut Stain Distress Oxide to the outer edges for shading.

Then followed up with Black Soot Distress Ink around the edges, to really make it dramatic. I also applied a tiny bit around the outer edge of the moon as well. Then I removed the moon mask and dried with heat tool. At the time I made this card, I didn't have the new Black Soot Distress Oxide…but it would be fabulous as well.

Now you could stop here, if you wanted more of a neat clean look.

I added a few spritz of water using the Distress Sprayer, then dried with a heat tool.

I cut a piece of Distress Mixed Media Heavystock 81/2 x 5 1/2. Then applied a layer of white gesso and dried with heat tool.

I also applied a layer of Distress Collage Matte Medium on top of the gesso, then dried with heat tool. This really creates great texture for the Distress Crayons.

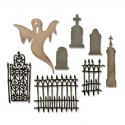
Tim Holtz Sizzix Thinlits Die Set 8PK - Village Graveyard
Item #662377

These dies are so much fun, I can't wait to use them in the Manor!!! I cut 2 ghost, 2 long fence, 1 short fence, 1 gate and 9 tombstones out of the gessoed Distress Mixed Media Heavystock.

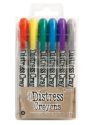
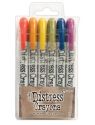
I added color and shading to each piece with Distress Crayons. I swiped a little on my non stick craft sheet and picked up color with my finger, then smudged on die cut. Working from lightest to darkest color, they layer beautifully.

The colors I used were Black Soot, Hickory Smoke, Pumice Stone, Walnut Stain and Peeled Paint.


For the gate and fence, I wanted more concentrated color so I added Black Soot directly on areas and smudged with my finger to blend.


After I had colored all my cutouts, I started assembling my card.

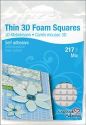
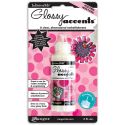
I attached the fence/gate to card front using glossy accents. The ghost and tombstones were attached at the tops with foam squares and the bottoms were secured with glossy accents. It gives the appearance of depth, without adding too much height.

I stitched around card front and distress with a bone folder. Then attached a light green classic kraft cardstock and black card base.

Tim Holtz Sizzix Thinlits Die Set 3PK - Vintage Spirits
Item #662385

I didn't have the Vintage Spirits die set when I made my card...but when I sent the card to Tim, he added "boo". LOL... I believe they were made for this card, it worked out perfect!


I hope you enjoyed todays Village Graveyard card! You can find the supplies I've used via the links below. I will be back thursday with my 2nd halloween tutorial. If you have any questions please let me know I love your comments, I truly appreciate each and everyone of them! As always thanks for stopping by and I'll see you next time! xx

 |  |  |  |
 |  |  |  |
 |  |  |  |
 |  |  |  |
 |  |  |  |
 |  |  |  |
 |  |  |

Love this card. Your instructions are fantastic.
ReplyDeleteThank you, I'm happy you like it!
DeleteGreat card Bobbi! TFS!
ReplyDeleteThank you Deb, I appreciate you stopping by! xx
DeleteI love your card Bobbi! So many details! Thanks for the tutorial. Liked the way you treated the tombstones.
ReplyDeleteBobbi, this is fabulous! Thanks so much for sharing your wonderful tutorial too! Looking forward to getting my hands on these new dies... Anne xx
ReplyDelete