Hello friends! Hope you're having a great day! I'd like to share a card I made for the Tim Holtz 'Facebook Live' event on Friday. If you missed the event, you can still go to Tim's Facebook page to view a re-play. I'm loving ALL the Halloween Release. There is so much wonderful inspiration, you don't want to miss it! I absolutely adore fall. I love the colors, the scents and the chill in the air…that's my inspiration for this card! I've got a fun a tutorial for you today, how I put this together.
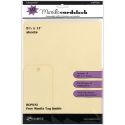
I started with a piece of Ranger Manila card stock 4 x 5 1/4 and some vintage dictionary paper. I adhered the dictionary paper to the manila using Matte Distress Collage Medium (not crazing) with a collage brush. Then dried with a heat tool and trimmed off the excess book paper.
I gave the dictionary paper a wash of Dina Wakley White Gesso using a paint brush, just enough to mute the background. Then dried with a heat tool.
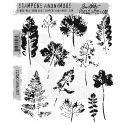
I selected three leaves from the new Tim Holtz Stampers Anonymous Leaf Prints set CMS273. I used Jet Black Archival Ink for a bold contrast for stamping. I did use a heat tool on my stamped images to insure they were completely dry and ready for watercoloring.
I chose distress paint to watercolor with in Mustard Seed, Fossilized Amber, Ground Espresso, Carved Pumpkin, Spiced Marmalade, Twisted Citron and Peeled Paint.
I applied one drop of each color to my non stick craft mat, along with a spritz of water to dilute the Distress Paint for watercoloring. I picked up a little color along with some water on my waterbrush and began to color my leaves. Give the waterbrush a squeeze to dilute color even more, if needed.
I dried card with heat tool between each color change. Also applying color splatters to background as I went along and drying after each color. If your preference is a clean bright look, you could stop here and add to a card front…it would be beautiful! You know me, I had to go a few more steps to achieve a vintage/distressed feel.
I applied a layer of Distress Collage Crazing Medium with a collage brush, some areas were a little thicker than others. The heavier the application in some areas, the crazing will be a little larger. It's really important to let the Distress Collage Crazing Medium air dry, do not apply heat.
It's now a sealed surface. It's almost impossible to see the crazing, even after it's dried, but it's there.
Now, this is where the magic happens! I applied a little Vintage Photo Distress Crayon to the dried crazing and smeared it into the cracks with my finger.
Voila…gorgeous vintage distress!!!
I went back in and added a little Walnut Stain Distress Crayon to the crazing as well for more shading and depth.
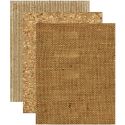
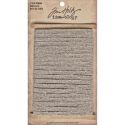
I think any of the Textured Surfaces (burlap, corrugate or cork) would look great on this card. I chose to use a strip of cork cut 1/2 in x 4 in. I also cut a piece of Linen Ribbon about 6 1/2 inches.
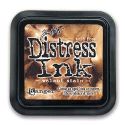
I shaded the edges of the linen ribbon and cork with Walnut Stain Distress Ink and a blending tool.
Then distressed the edges of the card with a bone folder.
For my card base I cut a 5 1/2 x 8 1/2 piece of brown Kraft Core cardstock. I scored down the center at 4 1/4 and folded to create an A2 card base Then sanded a bit with a sanding grip to expose some of that great kraft under the color. If you are sanding on your non stick craft sheet, always cover/protect it from scratches with a scrap piece of paper.
I attached the cork and ribbon to the card and trimmed off any excess. Then attached the card to the card base with adhesive. For a finishing touch I applied the "colors of autumn" Small Talk Occasions sticker to the lower righthand portion of the card.
This makes me want to put crazing on everything…now how big is that jar?
I hope you enjoyed todays project and give it a try! You can find the supplies I've used via the links below. If you have any questions please let me know I love your comments, I truly appreciate each and everyone of them! As always thanks for stopping by and I'll see you next time! xx






Gorgeous Bobbi, I adore the rustic feel to this . Gorgeous, gorgeous X
ReplyDeleteLove this card Bobbi - thanks for the great tutorial because I sure had no idea how you did it! and its so simple!
ReplyDeleteBeautiful,love the hint of color on leaves and the crayon in the crazing.
ReplyDeletelove this card Bobbi and yes crazing is very addictive xxx
ReplyDeletei love the little surface details in this card, so glad to get to see how you layered them in thier close-ups.
ReplyDeleteVicki
Beautiful!
ReplyDeleteYour work is beautiful and really inspires me! Thanks for great tutorial!
ReplyDeleteWhat a beautiful card. The tutorial was great.
ReplyDeleteAbsolutely gorgeous Bobbi, loved it when I saw it on Tim's Facebook live video and love it even more now! The crazing was the perfect finishing touch along with the cork and linen ribbon, thanks so much for sharing your techniques, can't wait to get that stamp! Deb xo
ReplyDelete