
Hello friends! The Tim Holtz Holiday Series continues and the project have been so inspiring, I hope you've been over to the Tim Holtz blog to check them out! Whether you're just starting out or you're a seasoned crafter, I have three fun holiday projects to share with you today focusing on the Festive Scribbles die set.

First up I made a gift tag perfect for all of those holiday packages, you could even slip a gift card inside and hang from the Christmas tree.

I spritzed a piece of watercolor cardstock with water. Then I sprayed Peeled Paint and a little Forest Moss Distress Spray Stain on wet watercolor cardstock and dried with heat tool. I picked up droplets of color off the Non-Stick Craft Sheet with watercolor cardstock, blotting to pick up the color (not swiping), then drying with heat tool. To further distress spritz a little water with a Distress Sprayer on watercolor cardstock and dry with a heat tool.

I diecut the smallest scribble tree from the colored watercolor cardstock, using the Festive Scribbles thin die set. Then I die cut one of the smallest stars from watercolor cardstock and colored with Tarnished Brass Distress Paint and dried with a heat tool. To add a little distress I sanded the star a bit with the a sanding grip.

The Tim Holtz Mini Cabinet Cards come in a pack of 6 with three different designs, so you have lots of choices I went with one of the oval cards. I scratched the surface of my mini cabinet card with a sanding grip to give it a little distress. Then I shaded my mini cabinet card and cut out scribble tree and star with Ground Espresso Distress Ink and a blending tool. I cut a small piece of patterned paper from the Yuletide Paper Stash and slipped inside my mini cabinet card. I attached the scribble star to the left front side of my mini cabinet card using glossy accents. then I stamped to and from with jet black archival ink and attached a piece of metallic ribbon and the festive token.

Next up I made a fun Christmas card with lots of layers.

I inked up the plaid background stamp with pumice stone distress ink, and stamp the image on a piece of scrap paper. Then I lightly spritzed water onto the stamp to regenerate the ink. It's called second-generation stamping.

Then I stamped the watery plaid image onto the watercolored cardstock and dried with a heat tool. I love the distressed effect it gives to the great neutral background.

I cut out the larger scribble tree with kraft core cardstock and sanded with a sanding grip. I die cut one of the smallest scribble stars from watercolor cardstock and colored with Tarnished Brass Distress Paint , then dried with a heat tool. I then sanded the scribble star with a sanding grip.

I selected some Christmas cutouts from the Festive Ephemera pack, a patterned paper from the Yuletide Paper Stash and kraftcore cardstock. I cut an 8 1/2 x 5 1/2 piece of #13 Kraft Core cardstock then score and folded to create a card front. I sanded all the paper pieces with a sanding grip to distress.

I did stitches around the stamped watercolor cardstock, but that's completely optional. I shaded all of the paper pieces with ground espresso distress ink and a blending tool, then further distressed the edges with a bone folder. I layered the kraft core card base, pattern paper and stamped plaid attaching with glossy accents. Then attached the scribble tree to left side of card with glossy accents, it's wonderful adhesive and comes with a fine tip nozzle just perfect for intricate gluing.

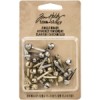
The new idea-ology metal pieces are so fun and festive, they really add just the right touch of vintage Christmas! I snipped the brad attachers off of the jingle bells and fasteners for this project. I layered all of the festive ephemera and idea-ology pieces and attached with glossy accents. I also attached a couple of small pieces of Yuletide Design Tape to the base of the card between the tree and ephemera.

The final project is a clean and simple watercolor Holiday card, with a wonderful sparkle.

I score and folded an 8 1/2 x 11 piece of Ranger watercolor cardstock in half. I spritzed the cardstock with water until saturated. I dabbed a small amount of Faded Jean and Stormy Sky Distress Stain onto my nonstick craft Matte. I picked up some of the color with a paintbrush and brushed a small scribbled line across my water saturated card stock. The second the color hits the water it wickes out, it's really fun because distress products are water activated. Now that strong line of color might be a little scary, but the more water you spritz the lighter it will become. If you get too much water or color, just soak up the excess with a dry paper towel it will act as an eraser. Then dry with a heat tool.

I picked up droplets of color off the Non-Stick Craft Sheet with the watercolor cardstock, blotting to pick up the color (not swiping), then drying with heat tool. I continued to repeat this step until I was happy with the level of distress.

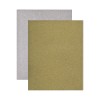
I adhered gold and silver deco sheets to manila cardstock, they come with an adhesive backing. I diecut 3 scribble circles out of silver deco. 1 large scribble star and 2 small scribble stars out of gold deco. To give the circle and star cut outs more dimension I attached with small pieces of adhesive foam.

I attached the scribble circles horizontally across my card front. I then attached the large star on top of the center scribble circle and the small scribble stars on right and left of the large star. then I selected the gold words "peace, love and joy" from the Gilded Holidays Remnant Rubs.
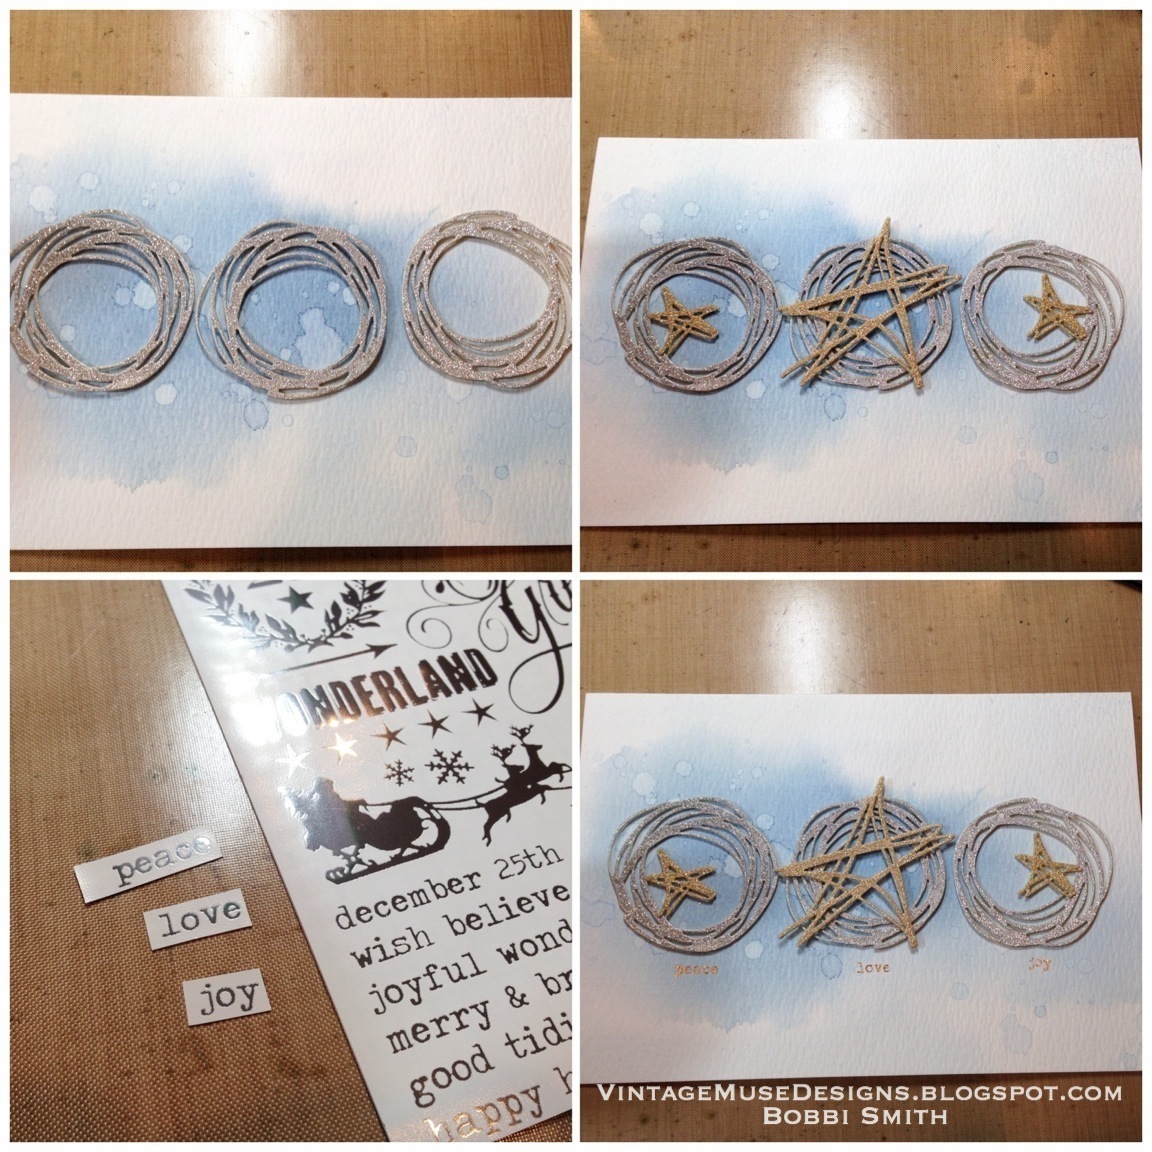
I attached the gilded rubs directly underneath the scribble circles with the remnant rubs tool. Then I finished off the card by attaching one of the silver ribbons from the metallic trimmings collection. In person, this card has a gorgeous intense sparkle from the Tim Holtz Deco Sheets used and the photos just don't do it justice.

I hope this has given you some fun holiday inspiration! Thanks so much for stopping by and have a wonderful day! xx


Oh those are fun !
ReplyDeleteRea' this Festive Scribbles die set is so versatile and so much fun to create with!
Deletegorgeous cards Bobbi...you rock
ReplyDeleteThanks Kath, you're such an inspiration to me! xx
DeleteFabulous! And the starred on could be used for Chanukah I do believe. Thank you for the inspiration!
ReplyDeleteBeautiful work Bobbi! I'm inspired!
ReplyDeleteOh dear Bobbi, I didn't think I needed these scribble dies.... I love all your makes, especially the third one, it is stunning!
ReplyDeleteGorgeous gorgeousness! Love these and now even more dies to add to my TH consumables, dies, stamps and stencils, plus many other products that I need lol! Karen x
ReplyDeleteI came over from Tim's blog to see the cards. Just amazing!
ReplyDeleteoh my soul!! these are beautiful!! totally simply beautiful!!
ReplyDeleteSimply stunning! Love both your cards !!! I adore Gold and silver deco !!!!Great work as always! Barbarayaya
ReplyDeleteGreat inspiration Bobbi! The second card is my favorite. The subtle blue with the gold and silver deco sheet stars and circles is lovely!
ReplyDeleteWow! Gorgeous and creative and well, just Wow! TFS.
ReplyDeleteBeautiful Bobbi, I didn't think the scribbles dies were for me but now I love them! Thanks for sharing your beautiful projects. Deb xo
ReplyDeleteCards are just lovely. I like how you pulled all the colors together to make it fun and festive. And, of course, you used so many of Tim Holtz products that make it look so polished yet easy.
ReplyDeleteI love your cards Bobbi. The watercolor holiday card is my favourite. Thanks for sharing such a great tutorial. :)
ReplyDeletebeautiful cards Bobbi!!
ReplyDeleteWonderful tutorial! Those cards are really beautiful! Now I have to buy these dies, lol.
ReplyDeleteWonderful tutorial! Those cards are really beautiful! Now I have to buy these dies, lol.
ReplyDeleteWhat fun cards, thanks for the inspiration.
ReplyDeleteA simple die with a huge impact! All of these are great!!!
ReplyDeleteSuper COOL projects!
ReplyDeleteI love all three but I think I love the middle one the best!!!
ReplyDelete