Hi everyone, thanks so much for stopping by today! I'm so excited to be
a part of the Creativations 2019 - Tim Holtz Blog Hop and Give Away!
You should have arrived here from the ever so talented Audrey's blog - if you didn't you may want to go back and check out all of her
wonderful inspiration! I'd like to share a project that I created for
Tim Holtz's Stampers Anonymous booth at Creativation (formerly-CHA) 2019
this year. I was so grateful to be asked to make a few things for Tim.
I'm sharing my "Mini Media Marks Card" made with the New Tim Holtz Stampers
Anonymous Mini Media Marks Stamp Set.
I really like the pop of color against the kraft background!
This is going to be one of those stamp sets that I use over and over again...
To start with, I cut a piece of Tim Holtz Mixed Media Heavystock 4 1/4 x
5 1/2. Painted a thin layer of Dina Wakley Media White Gesso onto the
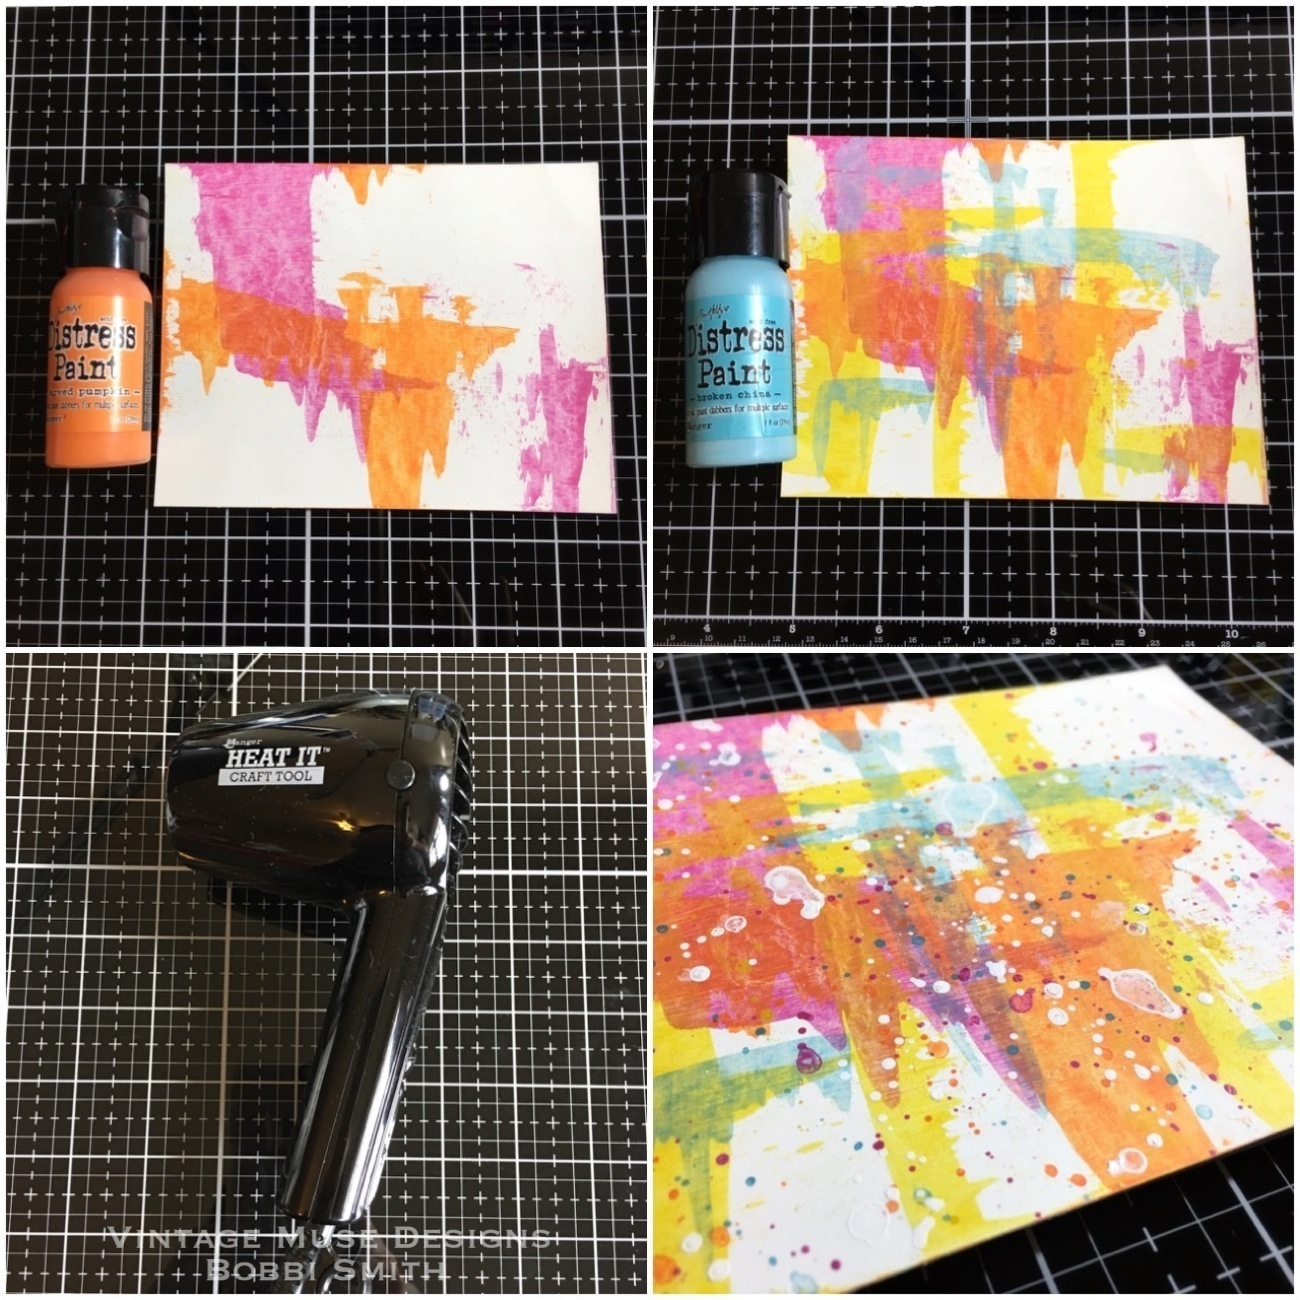
Heavystock panel. Then dried with heat tool. Then I selected a few bright colors of Distress Paint. The colors I used were Broken China, Picked Raspberry, Carved Pumpkin and Mustard Seed. I also used and old gift card for this technique.
I added one drop (a little goes a long way) of paint to my glass media mat and scrapped some color onto the edge of my gift card. Then dragged the wet distress paint across my panel, leaving some areas white. Then dried with heat tool. The baby wipes are handy for easy clean up on the glass media mat.
I continued building color with paints, drying between each new color. Then added splatters with same color palette of Distress Paints.
Tim Holtz Stampers Anonymous Mini Media Marks CMS364
All of the new Tim Holtz Stampers Anonymous Media Marks stamps are SO much fun to play with, I plan on doing a lot of journaling with them as well! For this card I used the new Mini Media Marks (CMS364). I attached my colorized panel to the travel stamp platform. I placed my first stamp down and closed the top to pick up the stamp. I used black gesso to stamp with because it has a heavy body and it completely opaque. I squeezed a dollop onto the glass media mat and picked up with a small brayer.
I inked the stamp using the gesso brayer and stamped onto the colorized panel. Clean your stamp right away, because once the gesso dries on the stamp it's almost impossible to get it off. I continued stamping/building my images until they were almost overlaping.
Once I was finished stamping my panel I cut 6 imperfect circles out of it. I mounted them to a piece of kraft card. Then ran a stitch down the center of the circles using white thread on my sewing machine. I attached the panel to a black card base. I smeared a little Picket Fence Distress Crayon into the quote token to bring out the wording. Then attached some linen ribbon and craft thread to the top. To give it a little lift, I used some foam squares under the quote token.
I hope you'll give it a try, it's a lot of fun! I would like to give a great big thank you to Tim, Paula and Mario for inviting me to be a part of Creativation. I would also like to say another big thank you to Richele for hosting this amazing blog hop!
GIVE AWAY DETAILS
PRIZES, PRIZES,PRIZES!
We have a few prizes to give away, just leave a comment on the different
blog hop posts for a chance to win.
Please leave a comment on all the blogs before February 9th at midnight PST and 3 winners will be announced February 10th on Richele's blog.
Next up on the hop is
Cathie Parreco!
Good luck and happy hopping!
Just incase you've missed anything when you're finished with Zoe's blog, head back over to Audrey's
blog and start again! I know I'll be checking out all of the
incredibly talented awesome designers many times, they're ALL amazing!
-----------------------------------------------------
**Blog Hop List**
In the weeks to come, I will be sharing more of my Creativation samples so check back often.
If you have
any questions please let me know I love your kind comments, I truly
appreciate each and everyone of them!
Bobbi
I've listed the products below, used to create this project. I am part of various affiliate programs including Simon Says Stamp. When you click on an affiliate link and make a purchase (at no extra cost to you), I receive a small commission. Thank you, I genuinely appreciate your support!


 Thanks so much for the visit. I really appreciate it, have a wonderful day! xx