Hello friends! The Tim Holtz Holiday Series continues and the project have been so wonderfully inspiring, I hope you've been over to the
Tim Holtz blog to check them out! I truly can not pick a favorite, I have loved everyone of them! For this project, I chose a vintage cigar box to create a small holiday vignette.
I just had to show you how gorgeous this cigar box truly is. There is so much heavy embossing and gold foiling it just added to the beauty. The lid was not intact but I didn't mind .
To start with I took 3 unfinished 3/4 inch wooden blocks and painted each with Fired Brick, Black Soot and Ground Espresso Distress Paints, then let dry. Once dry, I sanded the corners and edges to round out. Then I sanded the flat surface to remove some of the paint to give it an aged and distress look. I applied Antique Linen Distress Ink with a blending tool all over the block, then applied Ground Espresso to the corners and dried with the heat tool.

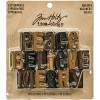
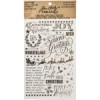
To finish off my blocks I applied the word "JOY" from the Gilded Holidays Remnant Rubs collection, using one letter to each block. They truly are gilded, with a high metallic gold shine! I used the word "Believe" from the Holiday Letterpress. First I applied a coat of Picket Fence Distress Paint to the raised letters and let dry. Then I applied Fired Brick and Peeled Paint to the raised letters staggering the red and green colors over top the dried Picket Fence Distress Paint. After both layers thoroughly dried, I took a sanding grip and sanded the raised letter surface to reveal some of the underlying white paint and bare wood. I love the distressed look it gives.

Now on to some metal! I applied a very small amount of Iced Spruce Distress Paint with my finger to the Foundry Frame, fork and the ice skate. Then after the paint had thoroughly dried, I applied a little Mushroom Alcohol Ink with an alcohol ink applicator tool to the metal pieces. I wanted to dangle the ice skates off the bottom of the foundry frame, but I needed to attach an O ring to the frame. I wire wrapped and O ring to the bottom of the frame, then attached the skates to the ring. Aren't they cute dangling off the frame like that?

Now on to the trees! I used one large and one mini Woodlands Tree. To start with I applied some Platinum Stickles to my nonstick craft mat and rolled my trees in the Stickles to apply...but let me tell you, in the end I just used my finger to apply the Stickles and it worked great. I also applied a little Stickles Platinum Dry Glitter while the trees were still wet, it just added a little extra sparkle and is totally optional. To make the cute little ball ornaments, I selected a few small pearl beads. I put them in a small zippy bag and added just two drops of red pepper alcohol Ink. I closed the baggie and moved the pearls around until they were coated with color. Then I poured them out onto the nonstick craft sheet to dry. I did the same thing for the green ball ornaments, the color combination was Lettuce and Botanical Alcohol Inks one drop of each color. After the ball ornaments had thoroughly dried, I attached them to the trees using glossy accents.

To finish off the large tree, I colored a Mirror Star with Mushroom Alcohol Ink and attached to the top of the tree using Glossy Accents. Paula had made some cute little snowballs on her blog last December and I thought they would make a great addition to my vignette.
Here's how she did it!
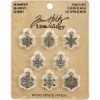
I distressed a Trophy Cup by applying Silver Mixative Alcohol ink and let dry. Then, I applied Mushroom Alcohol Ink to further distress. I attached one of the new Snowflake Adornments with Glossy Accent to the Trophy Cup. Then tied off a bow using the new Holiday Trimmings and attached with Glossy Accents. I sat the largest Woodlands Tree inside the Trophy Cup securing with adhesive.

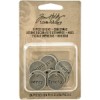
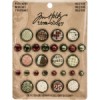
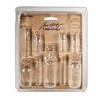
I applied a little Iced Spruce Distress Paint to the number 25 token and a small green pearl fastener. Then I applied some Mushroom Alcohol Ink to the Pearl Fastener, the Number Token and also a small Glass Corked Vial. I attached the Number Token with some foam tape. Then I snipped the back off of the Pearl Fastener with wire cutters and attached to the number 25 with a little Glossy Accents. I filled the small Glass Corked Vial about halfway full with Distress Stickles Clear Rock Candy Dry Glitter. Then I sat the Mini Woodland Tree just inside the top of the glass vial securing with a little glossy accents.

I smeared a little Picket Fence Distress Paint onto the wording of the Christmas Typed Token and wiped off the excess so that the paint just set into the recess of the wording. Then dried with a heat tool. I pounced a little Mushroom Alcohol Ink on the Christmas Typed Token to distress. I attached a Memo Pin to the back of the Christmas Typed Token then attached a Pearl Fastener securing with a little Glossy Accents. Using wire cutters, I sniped about a half inch off my Memo Pin. I attached a piece of tape to the end of the pin, so that when I snipped the wire it wouldn't go flying and never be found. I poked hole in the top center of the red lowercase E using a crafters pick, the wood is soft enough it's no problem. The Memo Pin fits very securely in the hole so no adhesive is required.

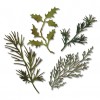
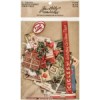
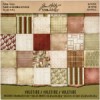
I selected one of the papers from the Yuletide Paper Stash collection and cut it down to size to fit my cigar box lid. I also added a piece of vintage sheet music from my collection. I cut out a few holly leaves with the Sizzix Tim Holtz Holiday Greens die set using kraft core cardstock. I sanded the holly with a sanding grip. I selected a piece of ephemera from the Festives Ephemera pack. All papers were shaded with Ground Espresso Distress Ink and distressed with a bone folder. I added a few white splatters using the new Distress Splatter tool and Picket Fence Distress Ink then dried with a heat tool.

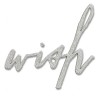
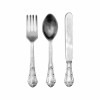
I attached the distressed fork to the piece of ephemera bending the paper through the tines to create a holder of sorts. I secured all paper pieces to my cigar box lid with a little Glossy Accents. I cut out the word "wish" from Manila cardstock using the Sizzix Tim Holtz Wish Bigzs die. I added Christmas Red Stickles to the wording to really make it pop. I secured to lid with small pieces of foam tape centering in the middle of the fork.
I selected some paper from the Yuletide Paper Stash collection and Festive Ephemera pack along with some vintage sheet music. I shaded and distressed all paper pieces with Ground Espresso Distress Ink and a bone folder. I layered up all paper pieces and attached to the inside of my cigarbox securing with Glossy Accents. Then I attached my Foundry Frame to paper pieces using Glossy Accents.
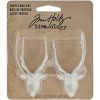
I applied a little Multi Medium with a brush to the Trophy Antlers then sprinkled generously with Dry Stickles Platinum Glitter. I must admit I already had a couple of pinecones premade from a previous project.
However,
Tim Holtz shows you how to make these awesome pinecones
here! I applied a little Glossy Accents sporadically to the edges of the pinecones and sprinkled Clear Rock Candy Distress Dry Glitter over wet adhesive, then set them aside to dry. I applied a little Pumice Stone Distress Paint to my Salvaged Doll, just to give her a little aged appearance.
Now, I added all the little goodies I made to my Christmas vignette.
The Letterpress "believe" was stacked and secured with a little Glossy Accents to fit nicely into the cigar box. The largest Woodlands tree was secured to the left-hand side of the box and the Mini Woodlands tree fit nicely right beside it. The "joy" blocks, pinecone, salvage doll and letterpress were all secured using a little Glossy Accents to the bottom of the cigar box. I reattached the lid using a little Yuletide Designer Tape. I love how this little piece turned out, it will be fun to display at Christmas time many years to come.
I hope this has given you some fun holiday inspiration! Thanks so much for stopping by and have a wonderful day! xx


